
| 일 | 월 | 화 | 수 | 목 | 금 | 토 |
|---|---|---|---|---|---|---|
| 1 | 2 | 3 | ||||
| 4 | 5 | 6 | 7 | 8 | 9 | 10 |
| 11 | 12 | 13 | 14 | 15 | 16 | 17 |
| 18 | 19 | 20 | 21 | 22 | 23 | 24 |
| 25 | 26 | 27 | 28 | 29 | 30 | 31 |
- 내브디 HUD
- Reactor600
- 필립스휴
- navdy HUD
- 대문각
- 삼성메모리 무상교체
- 핸디형 진공포장기
- 저공해자동차등록법
- 내브디
- 필립스IFTTT
- nest labs
- 김포버티칼월드
- 내비게이션 매립 diy
- navdy 사용후기
- QM5 내비매립
- QM5 내비매립 diy
- 저공해자동차스티커
- 신일 진공포장기 소개
- 네스트화재경보기
- 저공해자동차
- 네비게이션 매립 diy
- NAVDY
- Reactor900
- 김포클라이밍센터
- Deviale
- 삼성마이크로SD카드무상교체
- 총각냄새 없애기
- 저공해차량스티커
- IOT화재경보기
- nest protect
- Today
- Total
찬란하게
320d F30 Piezo Buzzer DIY 본문
I don't really understand while driving BMW for the second time... It is the absence of a piezo buzzer. What is a piezo buzzer? When you press the remote control switch, it is a beep~ beep~ and the buzzer sounds refreshingly. The higher the car, the clearer the sound
Anyway! There is No piezo buzzer!
So it was sweet again. In the past, I purchased the product from ID name 'Jonghyun's dad', who developed a piezo buzzer at Bimervek Cafe, and put it off. For vehicle die work, 50% of the people decide to die and 40% of them go to the front of the vehicle and disassemble the part. The remaining 10% is labor..
The piezo buzzer has a low level of difficulty and takes about 45 minutes. Since it is sold with a stripless connector, it is almost the same level as the jack-by-jack operation. I cover it once again to Jonghyun's dad who developed a good product.
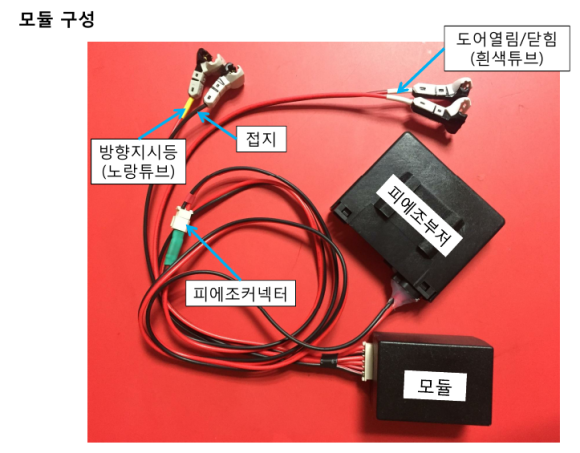
Piezo buzzer made by Jonghyun's dad.
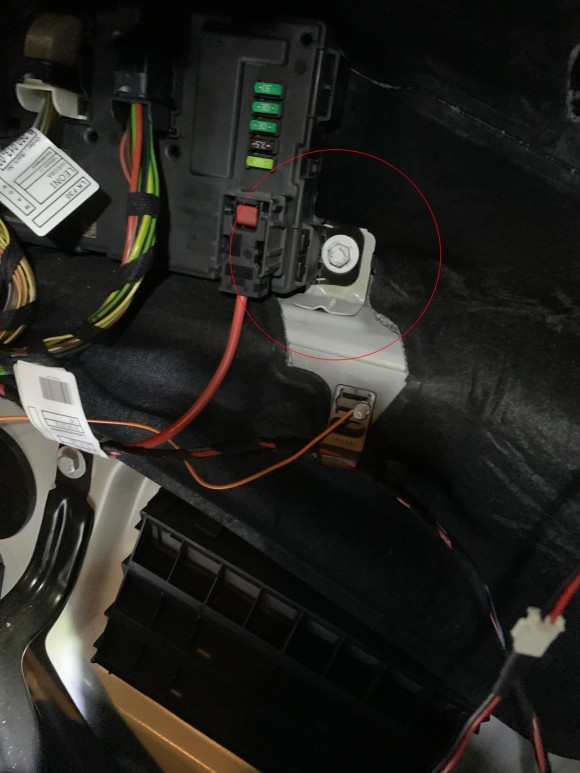
First, loosen the bolt in the red circle, and you can find the wiring of the gas outlet behind the module.
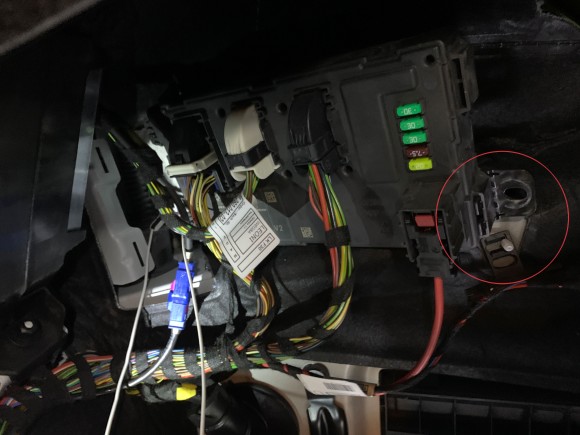
First, loosen the bolt in the red circle, and you can find the wiring of the gas outlet behind the module.

The gas outlet is a two-stranded wiring so you can find it right away. Connect the white cable of the piezo buzzer module without distinction. Since it is a non-breaking connector, you need to press it firmly with a panch to make the connection well.
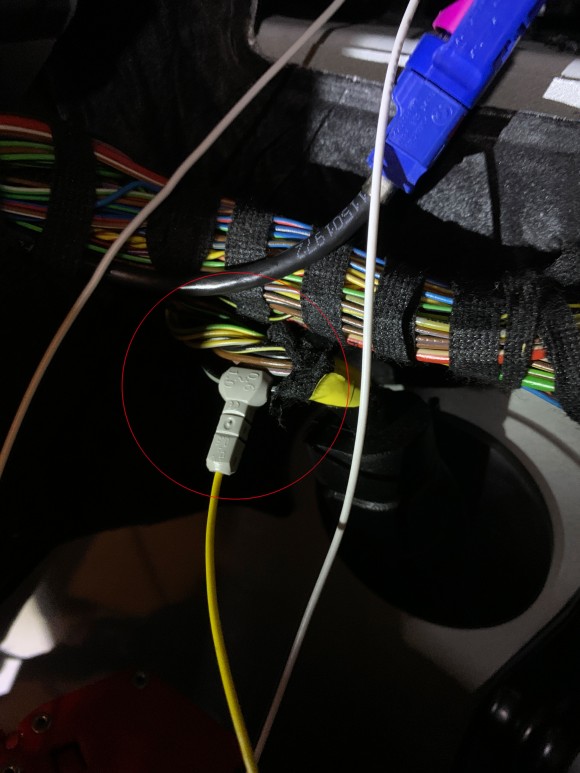
The turn signal cable is white black. Similarly, find and tighten the stripless connector. Find the brown wire and connect the ground

Piezo module is attached to the appropriate place
Next, the piezo buzzer sounding box disassembles the rear right-axis lamp and attaches it to a suitable place in the direction of rainwater. I attached it randomly, and then rainwater entered and the sound was not resolved, and I drained the water and reinstalled it in the opposite direction. Even if rainwater enters, the breakdown does not occur. No sound until just dry. Unfortunately, I couldn't take a picture with a piezo sound tube attached.
Now that we've installed it, let's listen. Clear sound~ Fine sound~
I don't know why BMW pulled out this common and rare piezo buzzer... but I hope it sells some basic stuff.
Next DIY is going to install the interior trunk button.